How to Create a Table in WordPress Without a Plugin
Editors Note: Do you need help with your WordPress site? Learn how you can get Unlimited WordPress Support 24/7 by U.S. based developers. Learn more
If you are wondering how to create a table in WordPress without a plugin, then you have come to the right place as we will walk you through how to do so step-by-step.
WordPress is one of the best CMS out there that will help you start a blog or a business website. When it comes to generating useful content, it can be helpful to present them in various ways like charts, graphs, tables, etc.
With the latest WordPress core update, it has become a lot easier for you to create tables in WordPress without plugins.
However, if you are not using the latest WordPress block editor, you can still easily create tables in WordPress without plugins.
Let’s have a look at the step-by-step guide to insert a table in your WordPress posts.
Create a Table Using Classic WordPress Editor Without a Plugin
If you are using WordPress classic editor, then there is a simple way to create a table without using a plugin. You will have to create your table outside of WordPress and then copy and paste it in your WordPress editor.
Here is what you will have to do.
Step 1: Create the table in Google Docs or MS Word
If you are creating the first draft of your article in Google Docs or MS Word, then you will have to create a table in that specific document.
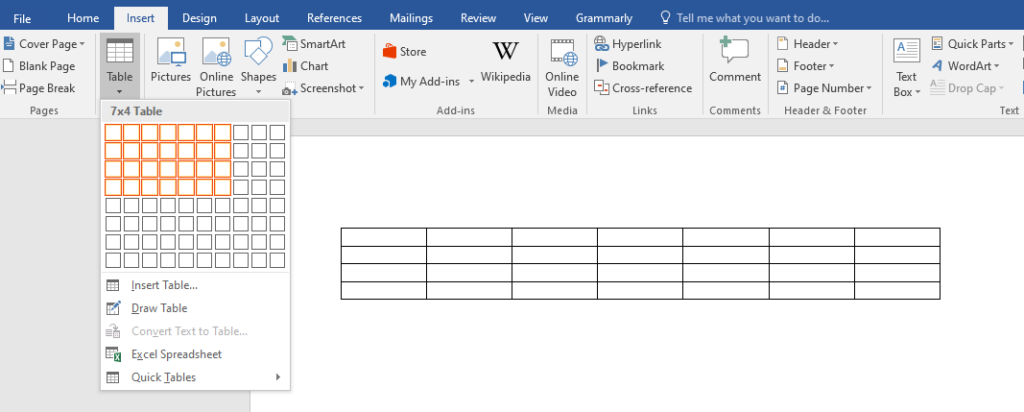
You will have to navigate to the top bar of MS Word and click the Insert button.
Here, you will see an option for inserting a table in the document. Click that option and you can generate a specific number of rows and columns easily to create a final table.
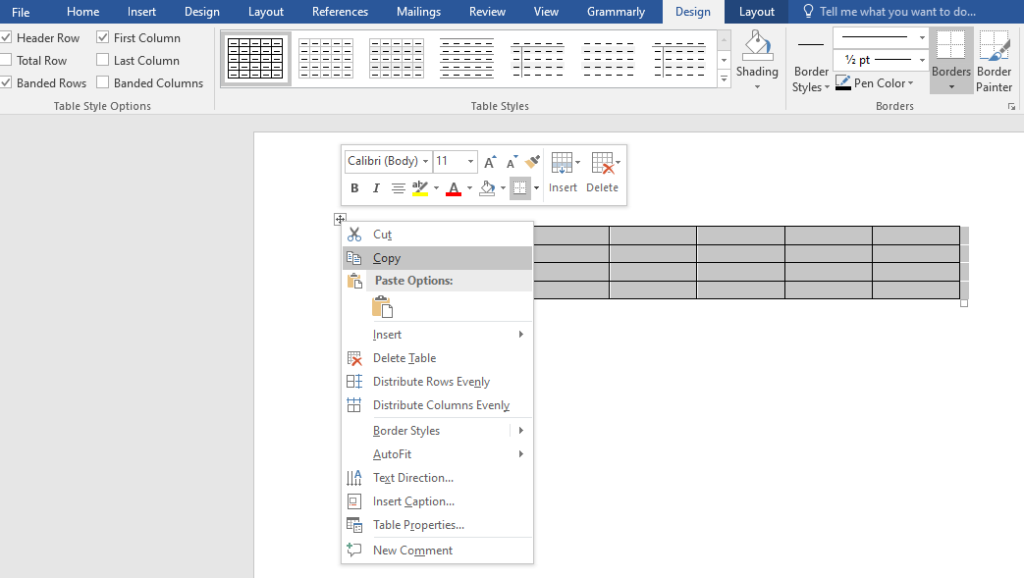
After creating the table with the proper number of columns and rows, you will have to copy the entire table.
Once you have copied the table from MS Word, you will move to the next step which is adding the table in your WordPress editor.
Step 2: Paste the table in WordPress
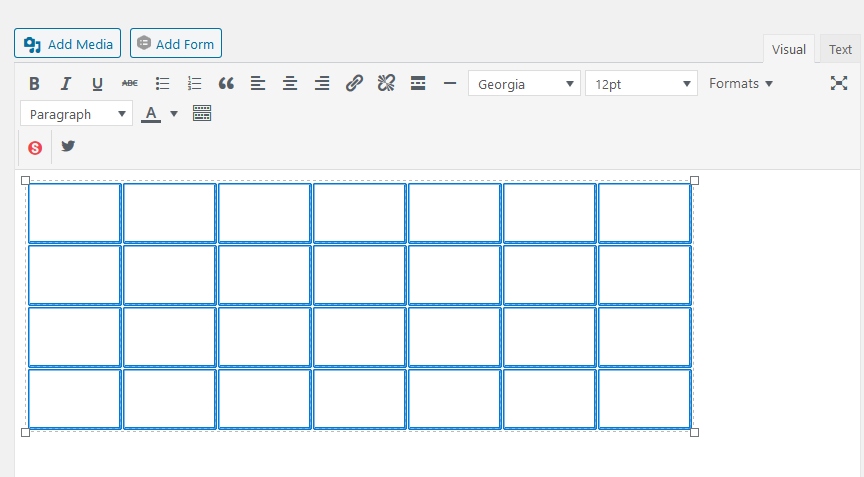
Now you will have to edit the post where you want to insert a table. Here, you will paste the table you previously copied from MS Word.
After pasting the copied table, you will be able to see the table in your post.
Now you can edit the table and enter the values in the cells that you have created.
Create a Table in WordPress Block Editor
Luckily, the latest version of WordPress has the block editor which makes things a lot easier for users.
You don’t need to use any plugin to create a table in WordPress with Gutenberg.
All you have to do is to visit Dashboard > Posts > Add New.
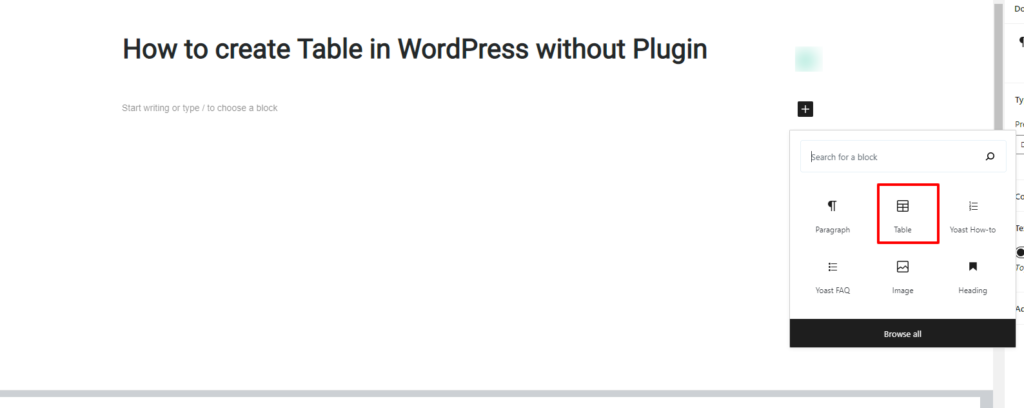
Here, you will have to add a new block and you will be able to see the option for block type.
Click that option to add a new table in your post.
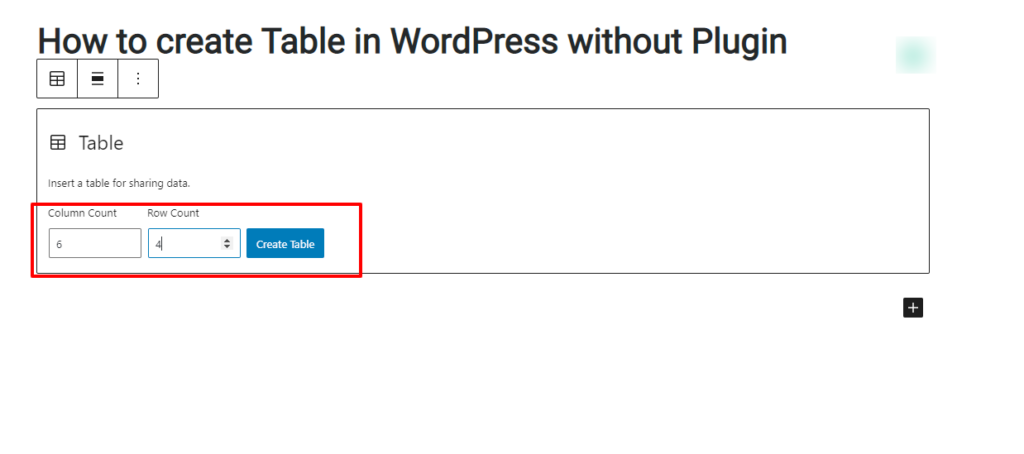
It will then ask you for the number of rows and columns that you wish to insert in the table.
Once you have added the number of rows and columns, you will then have to click the button that says Create Table.
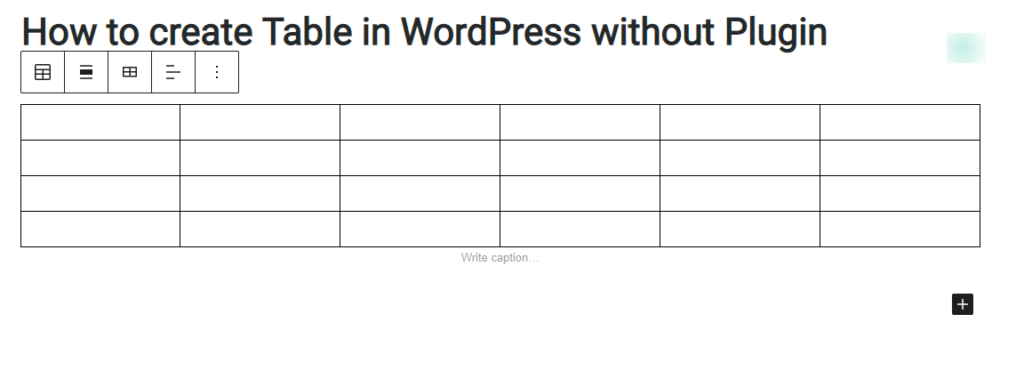
After that, you will see a new table in your WordPress editor and you can start adding values to the table you just created.
With the help of the new WordPress block editor, it has become extremely easy to add charts, shapes, and tables to your posts.
You don’t need any third-party plugins anymore to improve your content.
Need Help With Your WordPress Site?
While WordPress can be used by anyone there is quite a steep learning curve.
If you’re a busy entrepreneur and would rather “work on your business” versus working in your business then we suggest you have a team of WordPress developers to assist you with common WordPress tasks.
Get access to a team of professional U.S. based developers 24/7 to help you. Learn more at AccessWP.

