How to Create a Dropdown Menu in WordPress
Editors Note: Do you need help with your WordPress site? Learn how you can get Unlimited WordPress Support 24/7 by U.S. based developers. Learn more
In this article, we will show you how you can easily add a dropdown menu in your WordPress website without using any third-party plugins.
But before we begin, we want to share why creating a dropdown menu is important.
Let’s get started…
Why a Dropdown Menu is Important for WordPress
First and foremost, the function of a dropdown menu is to provide quick access to certain pages on your site to help boost conversions and control bounce rate.
Visitors will not leave your site if they can find what they were looking for.
Therefore, by organizing your menu in a logical manner, it will improve your user experience.
If you don’t have that many pages on your website, then you may not need to add a dropdown menu and leave it as a single row instead.
However, if you are running an online store or have a large website with multiple services and products, then having a dropdown menu makes sense.
You can easily organize the menu under one parent topic and then divide them into the hierarchy.
WordPress, by default, comes with dropdown menu support, and you can easily create a custom dropdown menu in the setting area.
Now, let’s learn how you can create a dropdown menu step-by-step.
How to Create a Dropdown Menu in WordPress
Step 1: Select a WordPress Theme That Supports a Dropdown Menu
Although WordPress comes with a built-in solution to create a custom dropdown menu, displaying these custom menus may require your WordPress theme to support this functionality.
The good news is, most WordPress themes do support a dropdown menu by default; however, some may not.
Therefore, before installing your WordPress theme, ensure that it does in fact support a dropdown menu.
You can quickly check whether or not your theme supports the dropdown menu by visiting the theme’s demo website.
Click on the menu bar and see if the dropdown menu shows in the navigation menu.
Some of the best available themes with dropdown menu support are:
- Astra
Astra is an excellent multipurpose WordPress theme that is packed with ready-to-use starter templates for any website, including eCommerce or blogging.
- Divi
Divi is one of the most popular WordPress themes that comes with a page builder and offers tons of exciting features. It also includes a drag-and-drop dropdown menu.
- Ocean WP
Ocean WP is famous for its ready-to-use theme templates, and you can also create a fully responsive website for an eCommerce store.
Step 2: Create a Simple Navigation Menu
Next, you will have to create a new menu that will appear on the top of the menu.
- To create a simple navigation menu, Go to Appearance > Menus.

- Click on create a new menu.
- Now you will have to name your newly created menu. This name will be visible only to you and not publically.
- Once you enter the name of your newly created navigation menu, WordPress will provide you with an empty menu ready to customize.
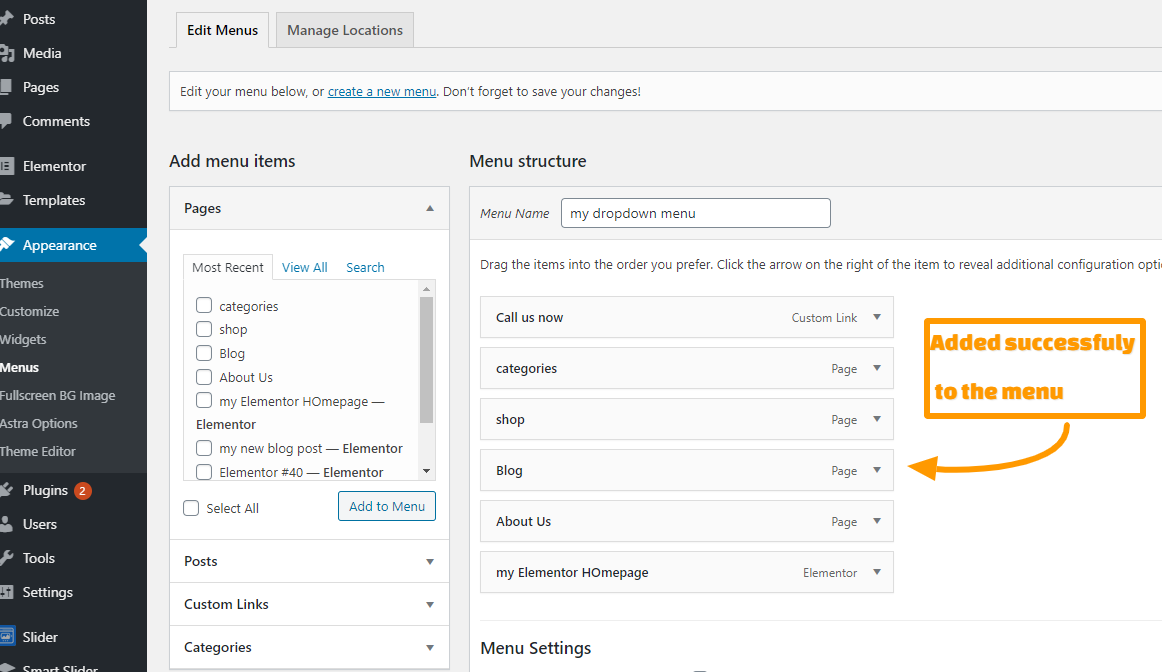
- Now select the pages you want to appear in your navigation menu from the left-hand sidebar and click add to menu.

- Once you have selected the pages you want to appear in your menu, they will automatically appear in the right column under the main menu.
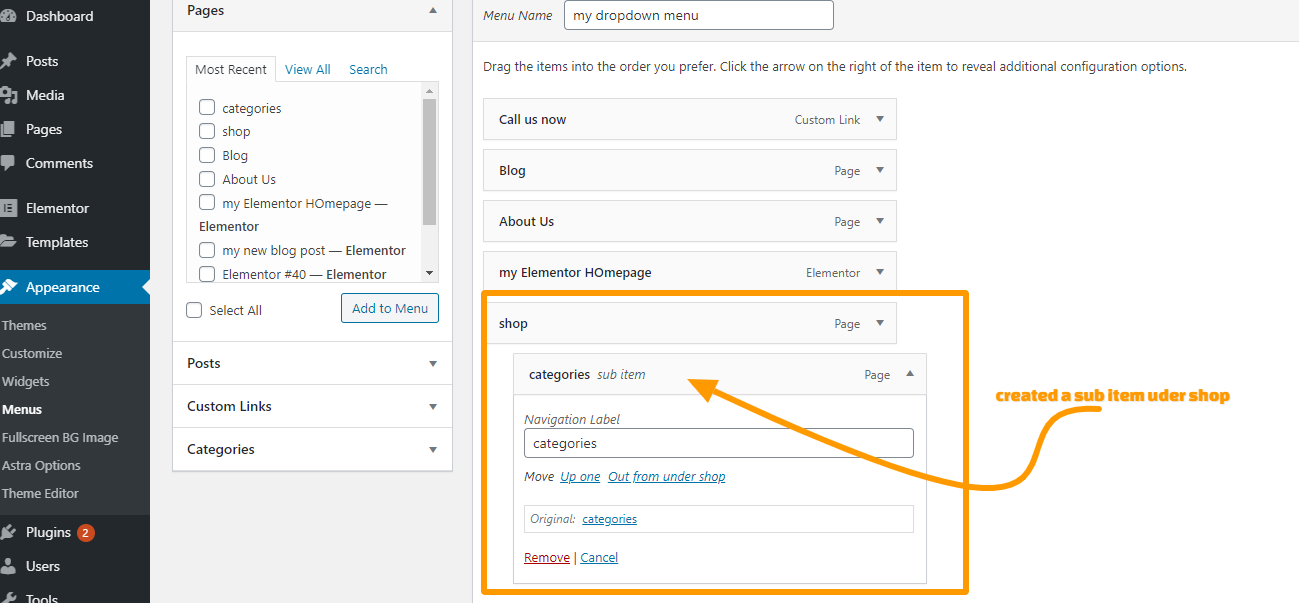
Step 3: Add Pages to Create a Submenu Dropdown
Now it’s time to select the pages that you want to add under the main dropdown menu.
Follow the same steps above again to add more pages to your menu.
To make the pages appear as a dropdown item, you can simply drag and drop them under the parent page.
And repeat the same procedure for every sub-item, placing them where you want them to show under the main dropdown menu.
Save the settings once you have finished the editing process.
Step 4: Publish the Customized Dropdown Menu
If you edit any existing menu that’s already published on your WordPress site, then there is no need to choose the location. It’ll automatically start appearing on your site.
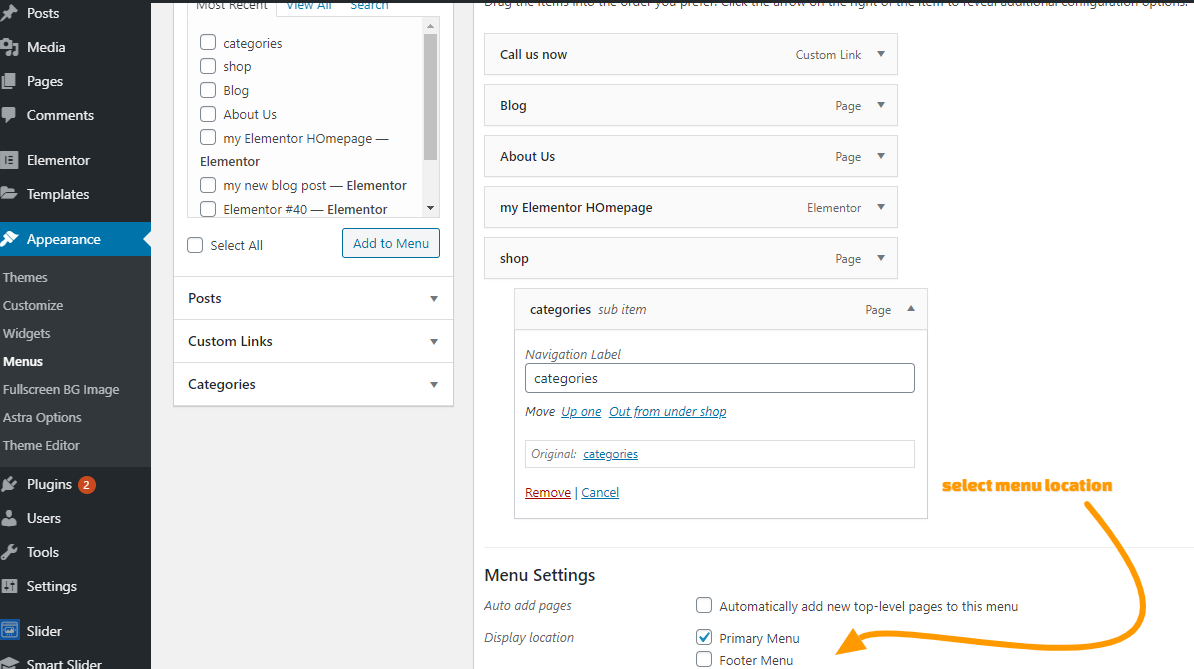
However, if you have created a new navigation menu, then the final step would be selecting the menu location.
The menu location option is available right under the Display location setting.
Click on the desired location and save your settings.
You can save your settings and then exit to view the dropdown menu on your website.
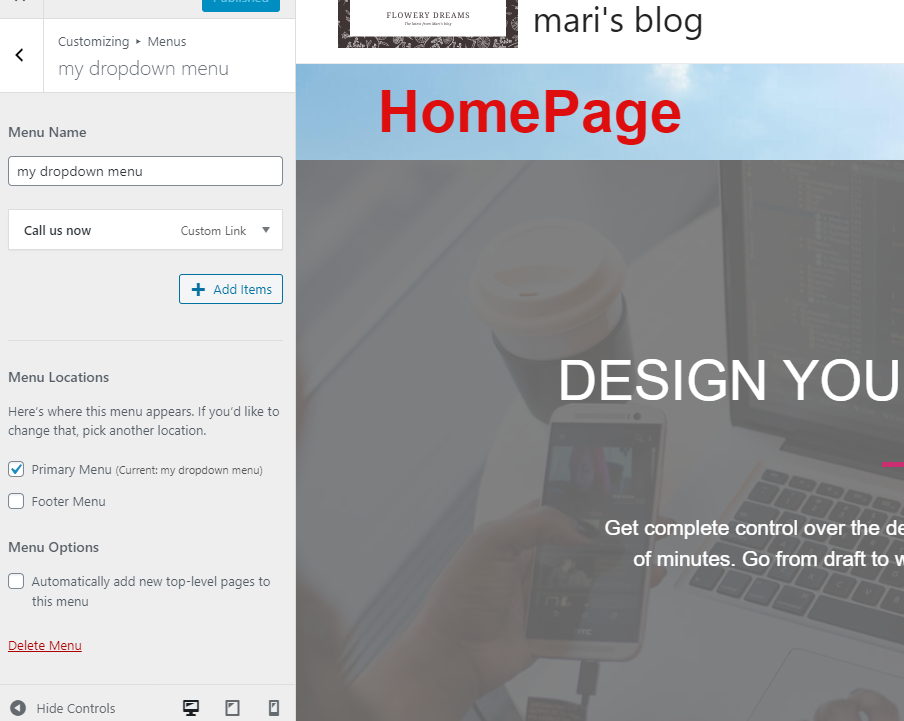
How to Create a Dropdown Menu With Live Preview Option
If you find it overwhelming to create a menu from the backend, then we have another option for you – a live preview option.
- To enable live preview, you have to switch to the visual preview.
- Go to the Appearance > Customizer > Menu > select the newly created menu.
- Once you enable the menu, you will see the live preview of the selected menu in the left sidebar.
- You can edit the menu using the visual preview.
Summing up
While most WordPress owners find it a small matter, creating a well-organized menu plays an essential role in making or breaking your site’s success.
It’s extremely important to maximize the user’s experience; therefore, help your visitors make their way around your site easily by creating a well-designed menu.
If you find WordPress confusing and would rather have expert WordPress developers working on your site, then you should check out our WordPress support service, where you can get unlimited help for a reasonable monthly rate.