How to Resize Your Logo in WordPress – A Handy Guide
Editors Note: Do you need help with your WordPress site? Learn how you can get Unlimited WordPress Support 24/7 by U.S. based developers. Learn more
Do you need help resizing your logo in WordPress? Stick around as we share some ways you can resize it in this article…
A professionally designed logo is important for gaining customers’ trust. The logo symbolizes your branding, and it is the first thing that customers notice when they land on your website.
So, if you have designed your logo and now find it not fitting well into your website, you will have to find solutions to adjust its size.
How to Resize Your WordPress Logo
The recommended size for a square-shaped logo in WordPress is at least 250 x 250 px width and height. If you want a horizontal logo size 250 x 55 px.
- Login to your WordPress Dashboard
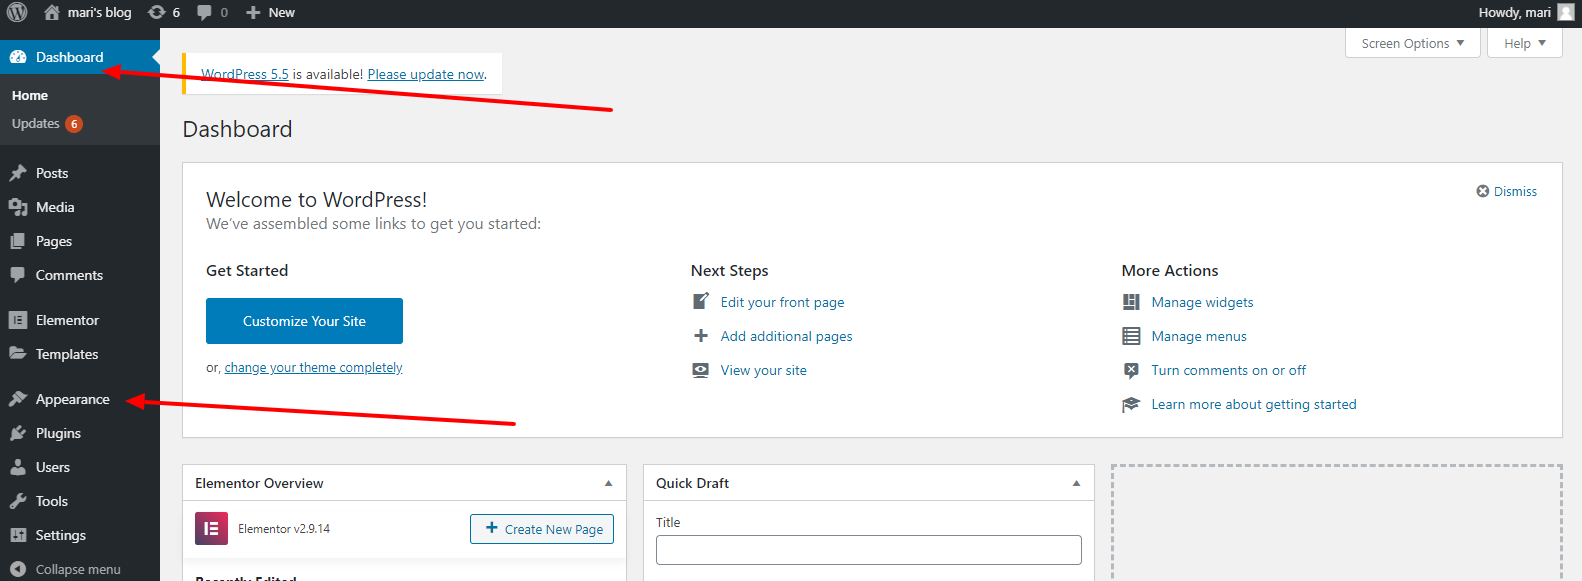
- Go to Appearance > Customize
- Now you have entered into the editor
- To upload your logo click on Select logo
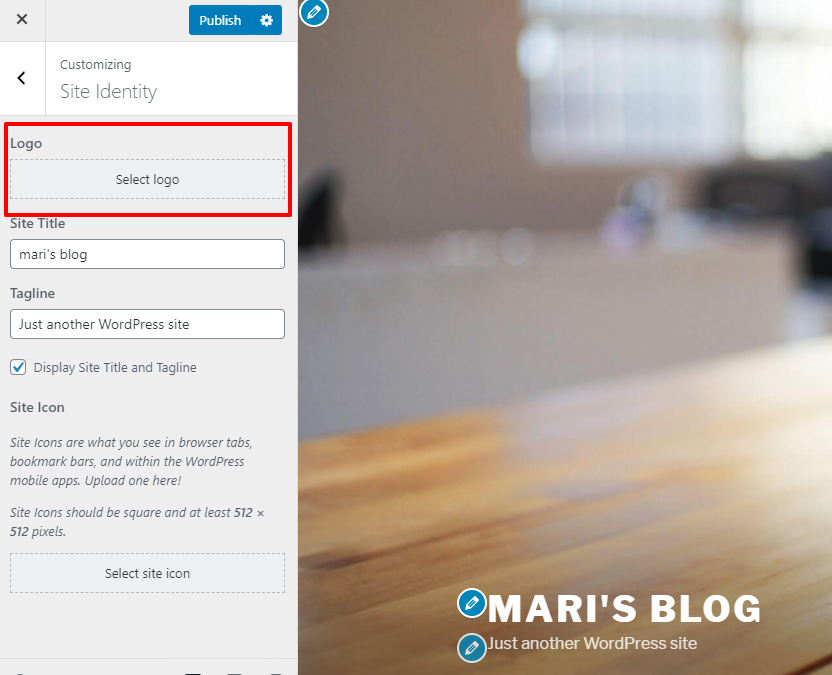
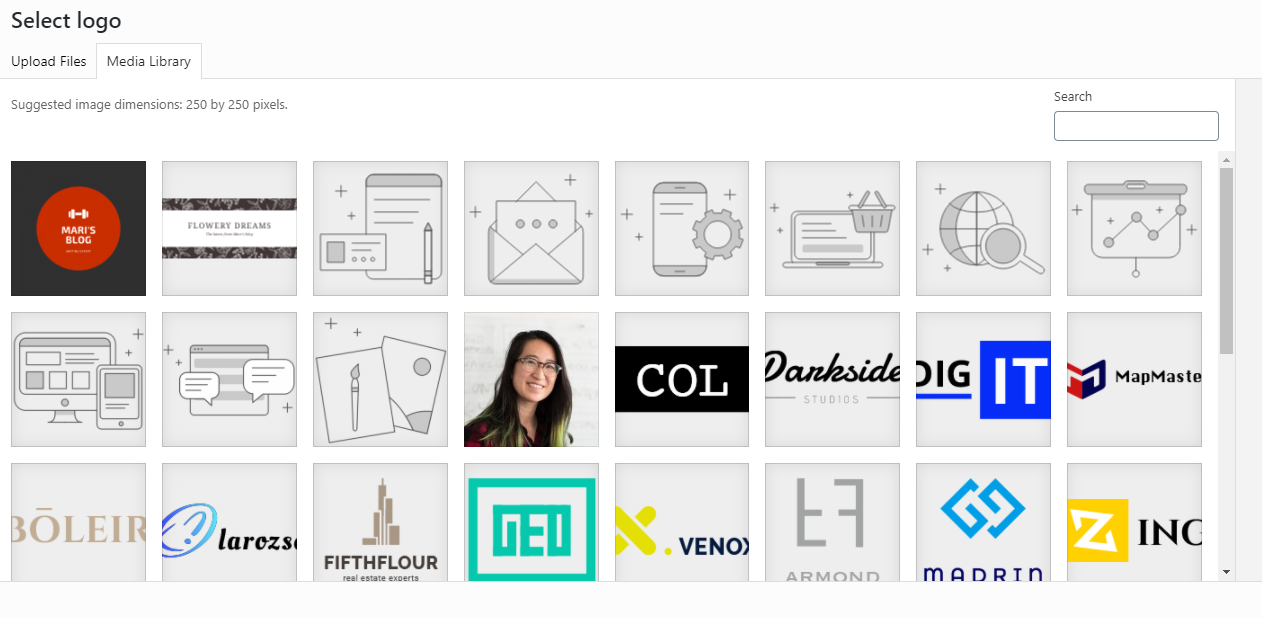
When you click on Select logo it will lead you to the media library; you can select any media file or upload your logo file manually from the drive.
Once you have selected your logo, you will enter into a window where you can resize or crop it. You can use the cropping handles to resize the image or reposition the image by dragging in your desired direction.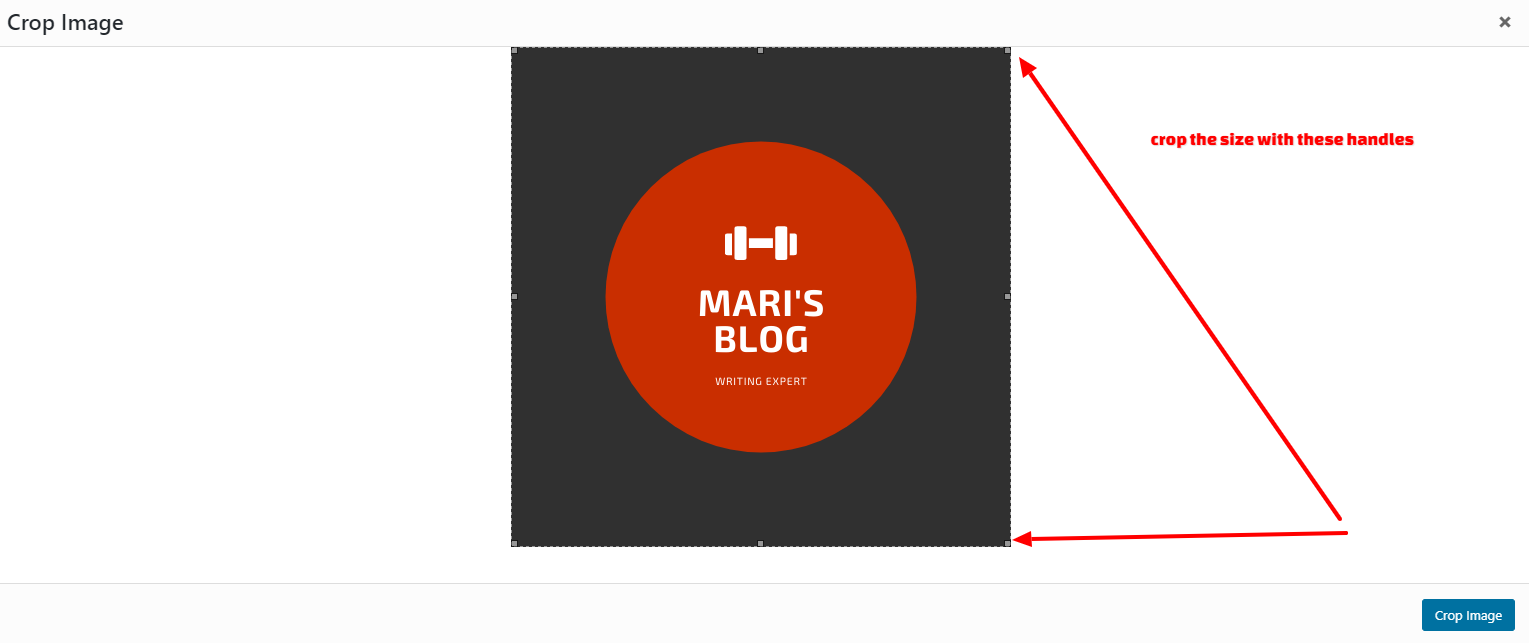
- When you are done with the resizing process, click on the Save button and your logo will be uploaded and your settings will be saved.
Alternatively, you can resize the logo just like any other image in the WordPress media library.
- Before uploading your logo, select the file.
- Now when you click on your logo file, you will notice its editing settings in the right menu bar. From here you can resize the image before uploading to the site.
![]()
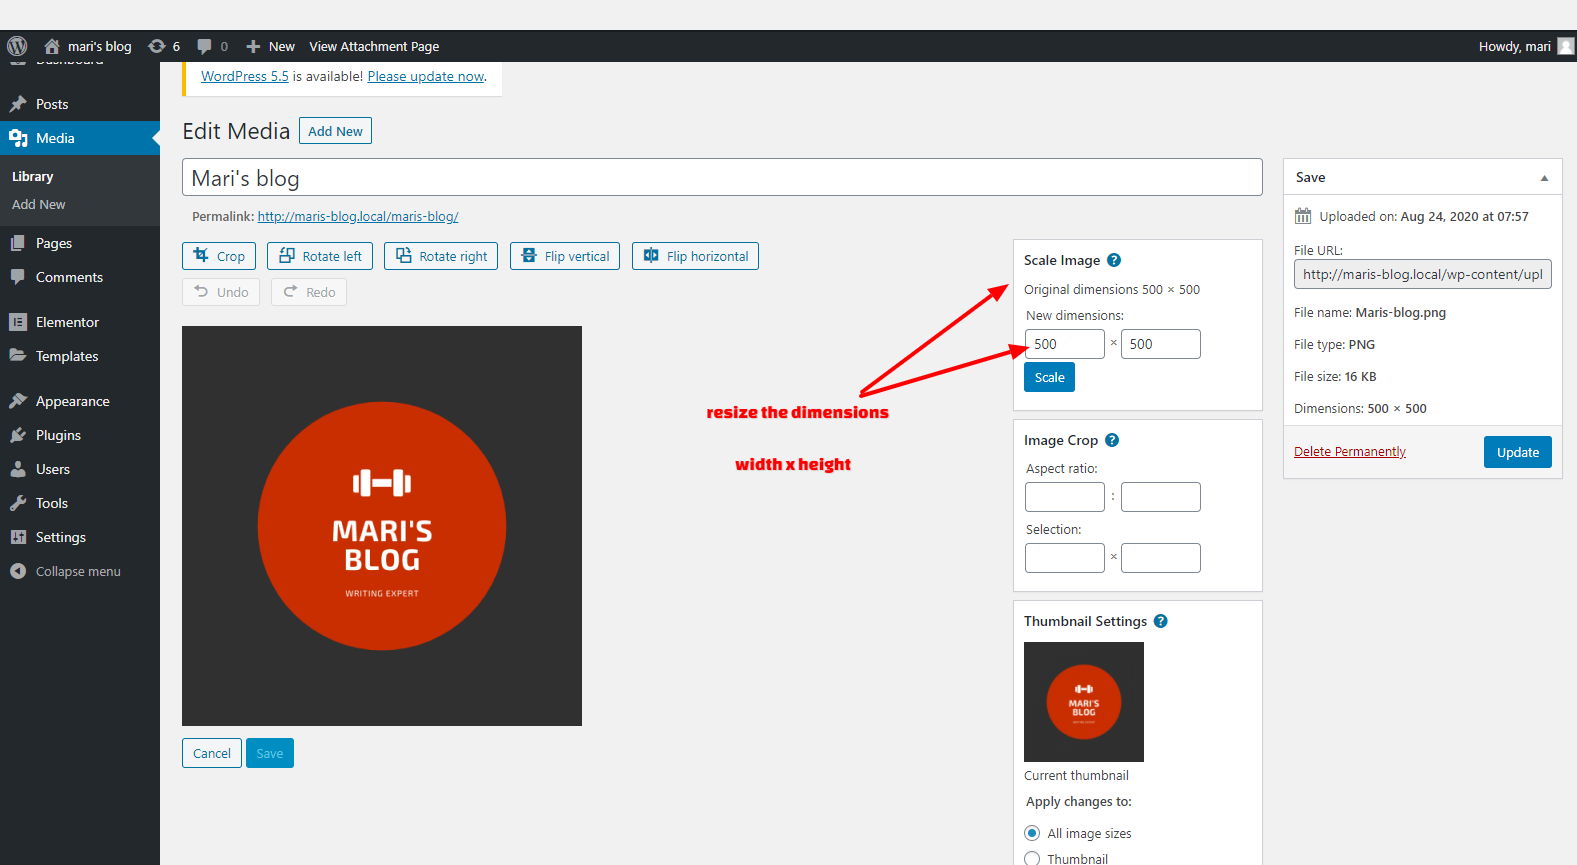
- When you click on Edit image you will enter into an editing window where you can see the original size of the image (500 x 500 px in the example). Here you can put your desired resolution and then click update.
That’s it! Now your logo has been resized and you can use this logo image on your site.
How to Resize Your Site’s Existing Logo
- If you have already uploaded your logo before you will see a blue pencil icon above the logo.
![]()
- Click on the blue pencil to edit the logo.
- Here you can see two options; Remove or Change logo.
- Click on the Remove icon to remove the logo from your site.
- Hit the Save button to save your logo settings.
- Or you can change the logo directly from Change logo.
- You will enter into your media library and then select your logo from there.
That’s it. This is how you can resize your logo using WordPress.
If you find it difficult to do, you can install any image optimizer plugin from the WordPress repository which will help you resize all of your images, including logos, on WordPress. Some of the best image optimizer plugins are Imagify and short pixel.
Or you can do the resizing in Photoshop or on Canva.com; these are free tools, and you can design your business logo and resize it without using any CSS code.
Also, most of the WordPress themes, such as Divi theme, come with default logo settings and let you reset the logo dimensions.
![]()
What Is the Most Recommended Logo Size for Any WordPress Site?
As we mentioned earlier, most of the themes come with their own default logo settings, and it mostly depends upon the header of the theme area.
The most recommended size for blog header logos is 250 x 250px. Author picture size should be 80 x 80 and your Favicon should not be less than 128 x 128 px.
Change Logo Size in WordPress Using CSS
Another easy way to change the logo size on your WordPress website is through CSS. All you have to do is to style the logo element on your website. It will require a little code knowledge, however, it is not something that is difficult to do.
The first thing that you need to do is to visit your website in the browser and right-click the logo. You will be able to see multiple options after right-clicking the logo element. You will then click Inspect.
![]()
After that, you will be able to see multiple code lines in the lower section of the browser. Here, you will have the element highlighter as shown in the picture below:

After clicking the highlighter, you will have to move the cursor towards the logo. Make sure that you are clicking on the logo to find the exact CSS class for the logo element.
Once you find the logo class, you will have to copy that CSS class and move to your WordPress Dashboard.
You need to navigate to Appearance > Customize. After clicking the customize option, you will be able to see the window where you can customize your website.
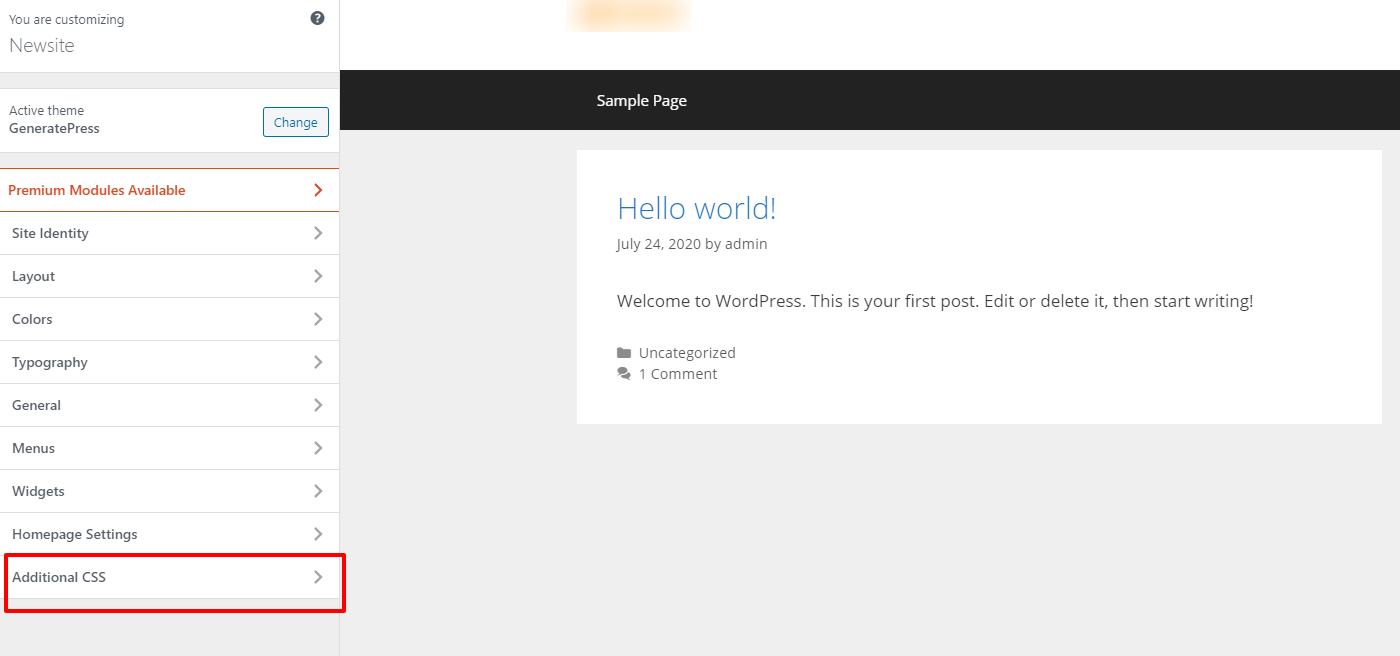
Here, you will find the Additional CSS tab. Now you need to copy the CSS class of the logo element that you previously found after inspecting the logo element.
Paste the class in the Additional CSS tab, and add the right properties for adjusting the height and width of the logo. Once you have pasted the code, it should look like this:
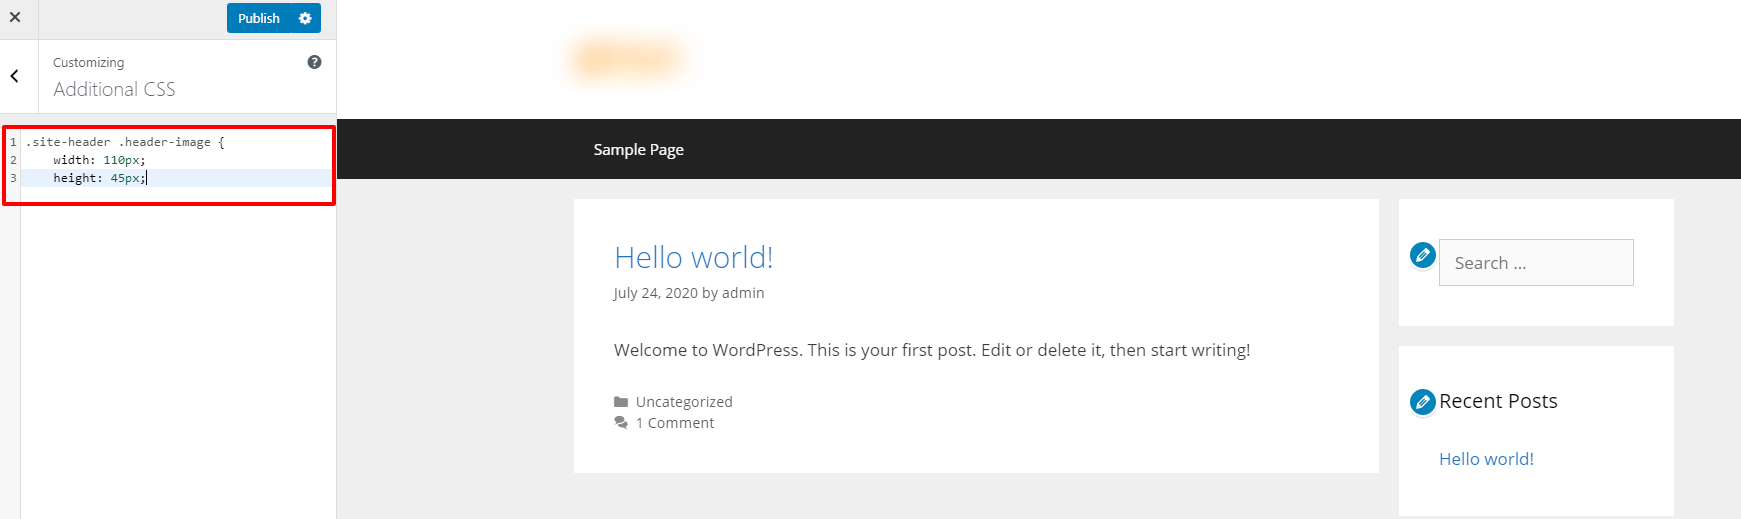
After adding the code lines, you will be able to see the changes to the logo size. With the right size adjustment, you will be able to achieve the desired size for the logo on your website. If you are happy with the size of the logo elements, you will hit the Publish button on the top to save all the changes.
Change Logo Size in WordPress With Theme Settings
Most WordPress themes have options to edit the size of the logo. If you are using a famous WordPress theme, then you will be able to find the logo size settings in the theme settings. Here, we have used the GeneratePress WordPress theme and we will show you how you can edit the logo size with the help of theme settings.
Once you have installed the theme, you will move to Dashboard > Appearance > Customize. After clicking the customize button, you will be directed to a live customization window:
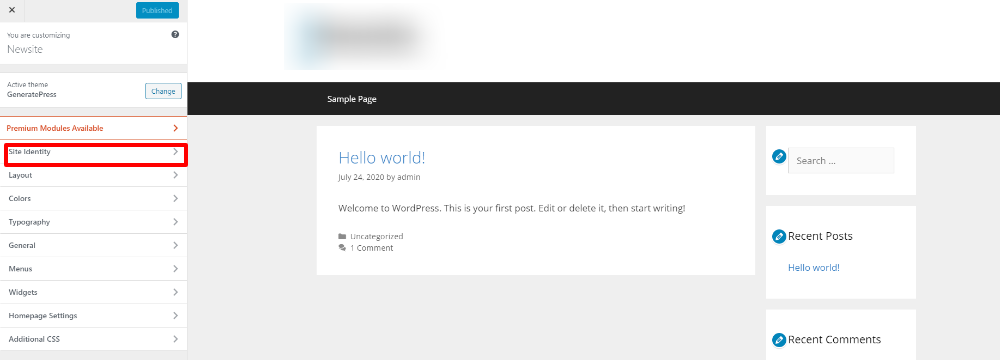
You need to click the Site Identity tab to open settings for the logo section. Here, you will be able to see multiple options including Site Title and Tagline.
![]()
Make sure to hide site title and tagline when you are about to upload a new logo. After hiding the tagline and site title, you will have to upload the logo you have for your website.
![]()
After uploading the logo, you will be able to see additional settings for the logo including Logo Width. Here, you will be able to change the logo width easily.
After resizing the logo, you will have to hit Publish and you will be all done with the logo settings.
You will be able to find a logo resizing option in the Site Identity tab for most WordPress themes. If you are using a premium theme, then you don’t require editing CSS to change the size of the logo.
Conclusion
Whether you are running a blog or a business website, you must learn a few tweaks that will help you save time and money when editing your website. When it comes to changing your logo size in WordPress, you need very little effort to find the right settings to make the changes. Make sure to use the easiest and safest ways to edit your website styling.
If you need help with your WordPress website, AccessWP offers unlimited WordPress support and maintenance for an affordable monthly rate.